
Understanding the MOOCAR PM Sensor in Modern Vehicles
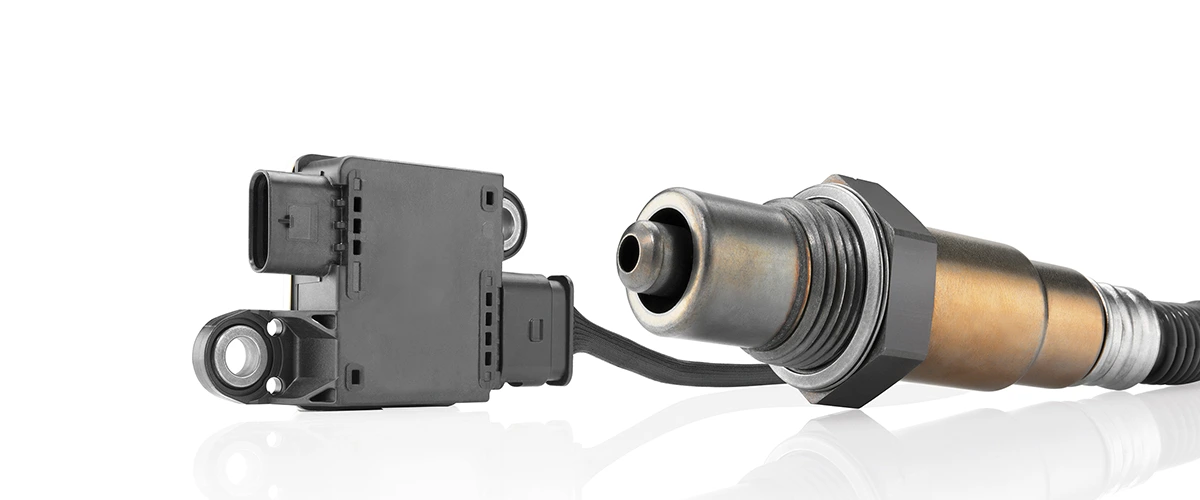
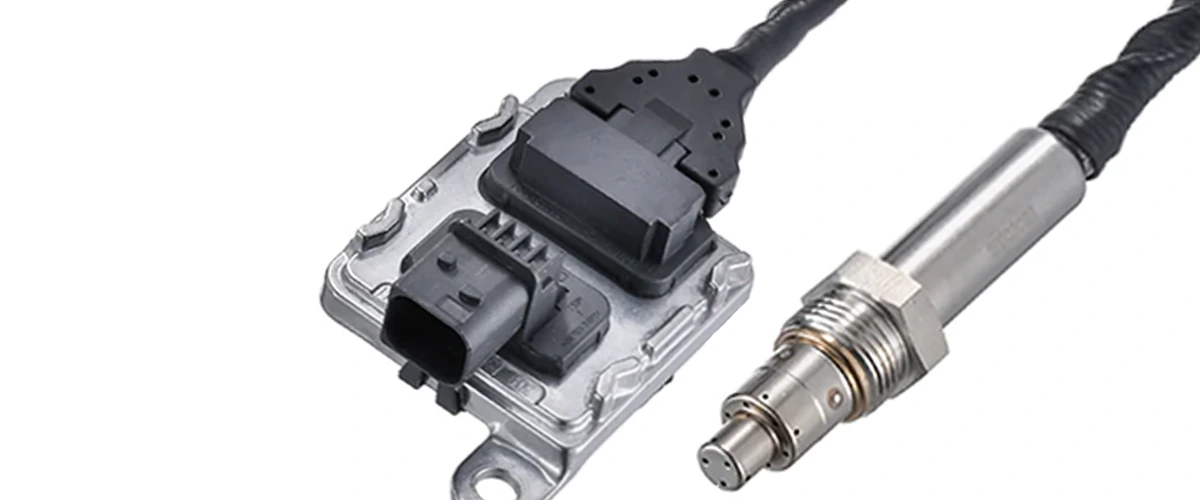
A Particulate Matter (PM) sensor is a critical component of modern vehicle emission control systems, particularly in diesel engines and gasoline vehicles equipped with Gasoline Particulate Filters (GPF). Its primary function is to monitor real-time concentrations of soot particles (PM2.5/PM10) in exhaust gases and transmit data to the Engine Control Unit (ECU). This enables optimization of combustion efficiency and ensures compliance with stringent emission standards (e.g., Euro 6, China 6B).
MOOCAR PM sensors, renowned for their high-precision detection capabilities, help vehicles maintain a balance between low emissions and high performance under diverse operating conditions. Alongside the PM sensor, other key components in the emission control ecosystem include EGT sensors (Exhaust Gas Temperature Sensors), NOx sensors, oxygen (O2) sensors, and differential pressure sensors, all of which work together to ensure reliable aftertreatment monitoring and system efficiency.
How Does a PM Sensor Work?
A PM sensor typically consists of:
- Sensing electrodes
- Heater elements
- Microcontroller
- Measurement chamber
The sensor actively draws exhaust gas into its chamber. The soot particles are electrically charged and collected on the electrodes. By measuring the electrical current or resistance change between the electrodes, the sensor calculates the PM concentration in mg/m³.
The MOOCAR PM sensor incorporates high-temperature-resistant ceramics and advanced signal processing, allowing real-time data feedback to the ECU.
Why PM Sensors Failed?
Several factors can lead to PM sensor failure:
Soot overload due to unburned diesel or late DPF regeneration.
Excessive moisture or condensation entering the sensor chamber.
Wiring issues, such as corrosion or short circuits.
Sensor heating element damage, causing incorrect readings.
Use of non-OEM sensors, leading to compatibility issues.
The MOOCAR PM sensor is designed with advanced thermal protection and auto-cleaning features to minimize premature failures.
Common PM Sensor Fault Codes
When the PM sensor fails, the ECU typically logs specific fault codes. Some common ones include:
- P148F: Particulate Matter Sensor Circuit Range/Performance
- P1490: PM Sensor Heater Circuit Malfunction
- P2463: Diesel Particulate Filter Restriction – Soot Accumulation (linked to PM sensor anomalies)
- U0235: Lost Communication with PM Sensor (CAN bus failure)
- P24AE: PM Sensor Circuit Range/Performance
- P24B1: PM Sensor Heater Performance
- P24B0: PM Sensor Incomplete Burn-off
- P24C6: PM Sensor Temperature Sensor Fault
- P24C5: PM Sensor Heater Control Circuit Short
These codes can often be read with standard OBD-II tools.
Symptoms of PM Sensor Malfunction
- Warning Lights: Illuminated Malfunction Indicator Lamp (MIL) or DPF/GPF-specific alerts.
- Reduced Performance: ECU activates limp mode, limiting torque output.
- Increased Emissions: Excessive exhaust smoke or failed emission tests.
- Regeneration Failure: DPF/GPF cannot self-clean, raising exhaust backpressure.
- Abnormal Fuel Consumption: Incorrect fuel injection strategies degrade fuel economy.
Types of PM Sensors
There are mainly two types of PM sensors used in vehicles:
1. Resistance-type Sensors
- Measure the resistance between electrodes as soot accumulates.
- Common in modern diesel vehicles.
2. Charge-type Sensors
- Ionize particles and measure the charge collected.
- Offer faster response but are more expensive.
MOOCAR offers resistance-based PM sensors, which are optimized for high accuracy, wide temperature range, and long service life.
Troubleshooting a PM Sensor – Step-by-Step
Here’s a structured approach to diagnosing a faulty PM sensor:
Step 1: Scan for DTCs
Use an OBD-II diagnostic tool to check for fault codes related to PM sensor operation.
Step 2: Inspect Wiring & Connectors
Check for corrosion, broken wires, loose connectors, or water intrusion.
Step 3: Monitor Live Data
Check the sensor’s output in real-time (usually in mg/m³ or voltage). Unusual spikes or flat-line readings may indicate failure.
Step 4: Check Sensor Heating Function
Use a multimeter to verify heater circuit continuity or perform an active test via scan tool.
Step 5: Test with a Known-Good Sensor
If in doubt, replace temporarily with a known working MOOCAR PM sensor and observe ECU behavior.
How to Replace a Faulty PM Sensor
Replacing a PM sensor is a straightforward task with the right tools:
Tools Needed:
- Socket wrench set
- Anti-seize compound
- OBD-II scanner
- Safety gloves
Replacement Steps:
- Turn off the ignition and let the exhaust cool.
- Locate the PM sensor, usually mounted after the DPF (downstream).
- Disconnect the electrical connector carefully.
- Use a socket wrench to remove the sensor.
- Apply anti-seize compound to the new sensor threads.
- Install the new MOOCAR PM sensor and torque to specification.
- Reconnect the wiring harness.
- Clear fault codes using a scan tool.
- Start the vehicle and check for normal operation.
MOOCAR sensors are built to OEM standards and pre-calibrated, so no special programming is typically needed.
As emissions regulations tighten, the role of PM sensors like MOOCAR PM sensor becomes even more critical. Ensuring proper sensor selection, installation, and maintenance will help reduce emissions, protect your engine, and maintain compliance.